Welcome to the website for landscape facilities products and knowledge.

What's the best way to anchor a bench on a gravel surface at our landscape facility?
Hello there! I’m the bench you see every day, standing quietly in the corner of your landscape facility, watching visitors pass by. And I have a confession: I used to wobble. Every time someone sat down, I felt like my legs were doing a little dance on the gravel. It was embarrassing. But then my caretaker found the perfect way to anchor me on this shifting, unpredictable surface, and now I’m as steady as a mountain. Let me share the secret with you.
The best way to anchor a bench on a gravel surface isn’t about brute force—it’s about giving me a solid foundation that works *with* the gravel, not against it. Here’s what worked:
Step 1: Choose the Right Bench with Pre-Drilled Feet
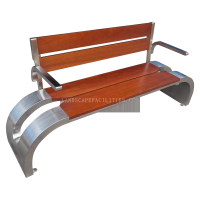
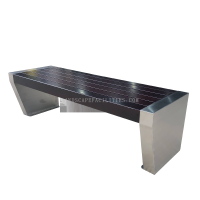
I’m a heavy-duty metal bench with wide, flat feet and pre-drilled holes. If you’re shopping for me, look for models that have at least four mounting points per leg. That extra surface area keeps me from sinking into the gravel like a tired toddler in a sandbox.
Step 2: Dig Down to Something Solid
My caretaker cleared a patch of gravel about 2 feet by 2 feet and dug down 4 inches below the surface. Underneath the loose stones, they found a layer of compacted soil. That’s my best friend. If your gravel sits on top of dirt, you’re in luck. If it’s just gravel over more gravel, you’ll need a different trick.
Step 3: Concrete Pavers as Underground Anchors
This is the game-changer. Instead of bolting me directly into the gravel (which would just pull loose), they placed two concrete pavers—12x12 inches each—beneath my feet. The pavers sit flush with the gravel surface, so you can’t even see them. Then they drove galvanized ground spikes through my feet, through the paver holes, and deep into the soil below. The pavers act like giant spreader plates, distributing my weight and preventing the spikes from pulling up.
Step 4: Gravel Stabilizer Grids for Extra Grip
For ultimate stability, they added a small section of gravel stabilizer grid (the honeycomb-looking plastic mesh) under my entire footprint. They cut a 2x2 foot square, placed it in the dug-out area, filled the cells with the same gravel, and set the pavers on top. This locks the gravel in place so it can’t shift under me when people sit down.
Step 5: The Final Touch - Gravel Lock
Once I was bolted down (use stainless steel bolts to avoid rust), they brushed a thin layer of clear gravel lock adhesive around the perimeter of my feet. This binds the top layer of gravel into a semi-solid ring, preventing the stones from scattering and leaving me looking unprofessional.
Now, even on the windiest day or when a group of heavy bags rests on my slats, I don’t budge. The gravel doesn’t create a dusty mess around my feet, and I look like I belong in this beautiful landscape.
A Few Pro Tips from Me to You:
- Always use galvanized or stainless steel hardware. Gravel is abrasive and moisture loves to hang around ground level.
- Check my alignment every season. Gravel can settle, so a quick twist of the bolt can tighten things up.
- For heavy-traffic areas, add a second set of pavers beneath the center of my seat. That extra support keeps the entire frame from twisting over time.
So there you have it—a concrete-paver-and-gravel-grid combo that gives me roots without requiring a full concrete pour. I’m stable, removable if needed (just unscrew me), and my caretaker didn’t have to fight with wet cement. We’re both happy. And now I can finally hold my head up high, knowing I won’t wobble when you come to take a rest. Cheers to solid foundations!
Related search: