Welcome to the website for landscape facilities products and knowledge.

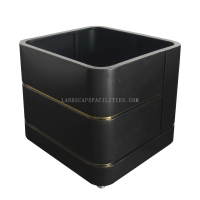
How do you make a tiered Plastic Planter Box?
Creating a tiered plastic planter box is a rewarding DIY project that can enhance your gardening space. Here’s a simple guide to help you get started:
1. Gather Materials: You’ll need plastic containers (preferably of different sizes), a drill, screws, a saw, and a measuring tape. Ensure the plastic is durable and suitable for outdoor use.
2. Design Your Planter: Decide on the number of tiers you want. Typically, three tiers work well. Sketch a rough design to visualize the arrangement.
3. Prepare the Containers: Clean the plastic containers thoroughly. Drill drainage holes at the bottom of each container to prevent waterlogging.
4. Cut and Assemble: Use the saw to cut the containers if necessary to fit your design. Arrange them in a tiered fashion, ensuring each tier is stable. Secure them with screws.
5. Add Soil and Plants: Fill each tier with potting soil. Choose plants that suit the depth and size of each container. Herbs, flowers, and small vegetables are great options.
6. Maintain Your Planter: Water the plants regularly and ensure they get adequate sunlight. Rotate the planter if needed to promote even growth.
By following these steps, you can create a beautiful and functional tiered plastic planter box that adds charm to your garden or balcony. Happy gardening!
Related search: