Welcome to the website for landscape facilities products and knowledge.

What are the best ways to create tiered acrylic landscape tree boxes?
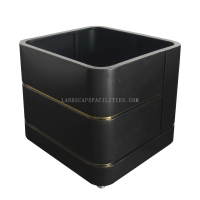
Creating tiered acrylic landscape tree boxes is a fantastic way to add a modern and elegant touch to your garden or indoor space. These transparent, layered planters not only showcase your plants beautifully but also create a visually striking display. Here’s a step-by-step guide to crafting your own:
1. Gather Materials: You’ll need acrylic sheets (clear or tinted), a laser cutter or acrylic scoring tool, acrylic glue, a ruler, and plants or small trees.
2. Design the Tiers: Sketch your desired tiered structure, ensuring each level is slightly smaller than the one below. Use software like Adobe Illustrator or AutoCAD for precision if using a laser cutter.
3. Cut the Acrylic: Carefully cut the acrylic sheets into rectangular or square pieces for each tier. Smooth the edges with sandpaper to avoid sharpness.
4. Assemble the Boxes: Glue the sides of each tier together, ensuring they are square and level. Use clamps to hold the pieces in place while the glue dries.
5. Stack the Tiers: Once dry, stack the boxes vertically, securing them with small acrylic rods or brackets for stability.
6. Add Plants: Fill each tier with soil and plant your chosen greenery, ensuring proper drainage by adding small holes if needed.
These tiered acrylic boxes are perfect for succulents, herbs, or small ornamental trees, offering a sleek and contemporary look to any space. Experiment with lighting or colored acrylic for added visual appeal!
Related search: