Welcome to the website for landscape facilities products and knowledge.

What are the best ways to assemble a polyethylene landscape tree box?
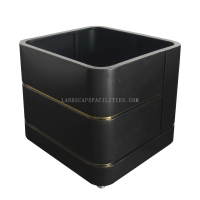
Assembling a polyethylene landscape tree box is a straightforward process that can enhance your garden or outdoor space. Here’s a step-by-step guide to ensure a smooth installation:
1. Gather Tools and Materials: You’ll need the tree box kit, a screwdriver, screws (usually included), and a level. Optional items include a rubber mallet for snug fits.
2. Prepare the Site: Clear the area of debris and ensure the ground is level. This prevents uneven settling and improves stability.
3. Assemble the Base: Start by connecting the bottom panels according to the manufacturer’s instructions. Secure them tightly with screws to form a solid foundation.
4. Attach the Side Panels: Slot the side panels into the base, aligning the pre-drilled holes. Use screws to fasten them securely. A rubber mallet can help snugly fit interlocking edges.
5. Check for Level: Use a level to ensure the box is even on all sides. Adjust the ground underneath if necessary.
6. Add Soil and Plant: Fill the box with high-quality soil and plant your tree or shrub. Water thoroughly to help the plant settle.
For longevity, choose UV-resistant polyethylene boxes and avoid over-tightening screws to prevent cracking. Regular maintenance, like cleaning and checking for loose fittings, will keep your tree box looking great for years.
This DIY project is perfect for beginners and adds a polished touch to any landscape. Happy gardening!
Related search: