Welcome to the website for landscape facilities products and knowledge.

What is the process for replacing the bin’s liner or inner container?
Replacing a bin liner or inner container is a simple yet essential task to maintain cleanliness and hygiene in your home or workspace. Here’s a step-by-step guide to help you do it efficiently:
1. Empty the Bin: Start by removing all waste from the bin. If the liner is stuck, gently shake the bin to loosen it.
2. Remove the Old Liner: Carefully pull out the used liner, ensuring no debris spills. For bins with inner containers, lift and detach the container.
3. Clean the Bin (Optional): Wipe the interior with a disinfectant or soapy water to eliminate odors and bacteria. Let it dry before proceeding.
4. Insert the New Liner: Open a fresh liner and place it inside the bin, ensuring it fits snugly. For inner containers, reattach the clean container securely.
5. Secure the Edges: Fold or clip the liner’s edges over the bin’s rim to prevent slipping.
Pro Tip: Use biodegradable or scented liners for an eco-friendly and pleasant experience. Regularly replacing liners prevents leaks and keeps your space fresh!
By following these steps, you’ll ensure a tidy and odor-free bin, making waste management hassle-free.
Related search:

Recommendation
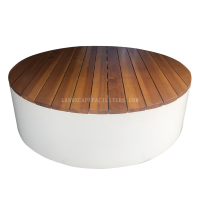
Round metal tube border design table with tempered glass or granite countertop on the top.